How to show every angle of a container with a lid without reshooting
- Yuri Pitomcev
- May 14
- 7 min read

It's a familiar phrase in any creative studio: "One more angle." Maybe you're reviewing images of a new product container the client wants to launch before a competitor does. The lid graphics look great from straight on, but a quick email arrives: "Can we also see it from a 45-degree angle? And maybe the top-down view so customers finally understand how the lid locks?"
Usually, this question triggers a flurry of calendar shuffling. How much will it cost to bring the container back to the studio? Can we still match the original lighting? Did we even shoot a reference for the inside of the container?
That entire production cycle is built on a single, expensive assumption: The only way to show your product is to have a physical sample in a physical place.
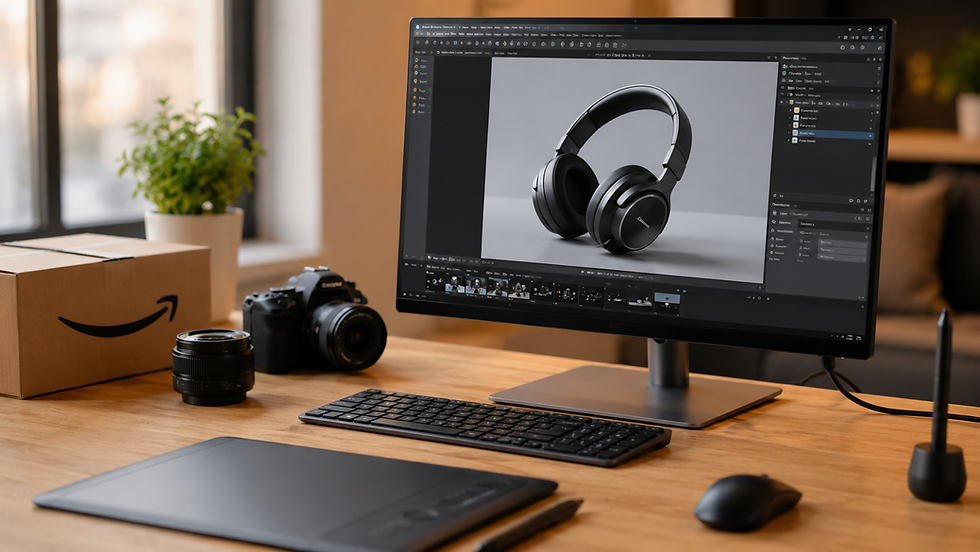
The visual mechanics: how CGI gives you every angle
Why a 3D workflow matters for your business
But 3D product rendering works on a different assumption. Show every angle of a container, with or without its lid, from all sides, from above, even in exploded view — all from a single digital model. No reshoots. No studio rentals. No racing against a launch date. Here is how it works and why it matters.

The core idea — one model, unlimited perspectives
With 3D rendering, you build a digital twin of your product one time. That single master model can generate every angle you will ever need:
Standard ecommerce shots – Front, back, side, ⅓ angle, and top-down.
Lid-off details – Show interior compartments, linings, closures, and sealing surfaces.
Exploded views – Separate the lid from the base with callouts.
360° spins – Let shoppers drag and rotate the product themselves.
Cross-section views – Reveal wall thickness, insulation layers, or nesting capability.
And you never have to reshoot. Because it is not a photograph. It is data.
When you build a 3D model for catalogs with many SKUs, variants, or products that need to be shown in different situations before they are even manufactured, traditional photography can keep you waiting for weeks. For large product lines, one master model can generate every single required angle without a reshoot.
The old way vs. the 3D way: side‑by‑side сomparison
Scenario | Studio photography | 3D product rendering |
Showing every angle | Requires physical product on a rotating turntable or multiple shoots. Each angle is a separate shot, requiring its own setup and lighting check. The camera stays locked, while the product rotates or the team resets the product between frames. | Render from any angle in seconds once the 3D model is built. With a full 3D model, you can freely adjust the virtual camera to any position you need. |
Lid‑on vs. lid‑off | Two completely different shoots (different lighting, product positioning, staging). | One model with the lid as a separate part; enable or disable it with a single click. |
Interior views | Nearly impossible without physically cutting the container (destructive). Lighting the interior of a deep container is a nightmare. | Trivial: hide the exterior shell, adjust the camera, and render the interior view transparently. |
360° spin | Requires 24–120 individual frames stitched together. You need a motorized turntable, a locked-down camera, and perfectly consistent lighting across every single frame. | Software‑generated image sequence is automatically produced from the same master model. Unlimited frame count, no drift, no flicker. |
Time to produce 12 angles | 2–3 days (including setup, shooting, and post‑processing). | 15–30 minutes of rendering time after the model is finalized. |
Cost per new angle | Additional studio time, photographer fees, retouching. | Near zero — the model already exists. |
Consistency across all angles | Difficult — lighting and white balance can drift between setups. | Perfect — the same lighting and camera settings apply to every render. |

The visual mechanics: how CGI gives you every angle
A rotating turntable attached to a camera is the most common studio jig for 360° product photography. For many studio photographers, this is their go-to 3D product photography setup for 360-degree spins.
The camera is locked down on a tripod while the product rotates on the motorized turntable. The photographer triggers the shutter at 24, 72, or 120 intervals as the turntable makes a full rotation. Those frames are later processed into a simple interactive viewer.
A 3D rendering workflow takes that same concept and removes all physical limitations.
With a digital master model, you can:
Rotate the product along any axis, not just horizontally.
Tilt the camera to shoot from above, below, or at any angle in between.
Hide or isolate individual components (e.g., show the container with the lid next to it, or remove the exterior shell entirely to reveal the interior).
Create orthographic projections (blueprint‑style, distortion‑free views) alongside photorealistic images.
The software handles all the complex camera matrices, perspective calculations, and lighting consistency automatically. Your internal team or your working relationship with a 3D studio focuses on the decisions that matter — not the hundreds of individual frames.

Why a 3D workflow matters for your business
The efficiency gains are not just nice to have. They drive measurable business results.
Launch products before they are manufactured. Your physical container might still be on a cargo ship, or your tooling might not even be finalized. With 3D, your marketing team can create full product pages and start pre-order campaigns months ahead of schedule.
Scale your catalog without proportional cost increases. A single 3D model can be rendered in 5 colorways, 10 camera angles, and 3 different lifestyle backgrounds — all from the same master file. Traditional photography would require 5×10×3 different physical setups or a massive post‑production effort.
Maintain perfect visual consistency. When a shopper scrolls through your product line, inconsistent lighting or white balance creates subconscious doubt. 3D rendering guarantees that every single image in your catalog shares the exact same lighting, color temperature, and shadow direction.
Test and iterate packaging designs before committing to print. Want to see how that new lid graphics looks from a low angle? Or test a different label placement without printing? In 3D, artwork can be swapped in seconds and rendered from any angle before a single box is manufactured.
Reduce product returns. When customers can see a product from every angle — including inside the container — they are less likely to be surprised by size, shape, or features. Better visual information leads to more confident purchasing decisions and fewer "not as expected" returns.
Once the master model is built, you control the camera position completely. With a full 3D model, you are not locked into a single perspective. You can freely adjust the virtual camera to any position, from any distance, and at any focal length.

A few examples from real categories
Food and beverage. A glass jar needs to be shown from the front and side, with the lid on and off, and with a 360° spin. Also, the inside of the jar needs to be visible to show the food product. 3D rendering handles all of this from one model without needing to restage, relight, or worry about breaking a glass jar during the shoot.
Cosmetics packaging. A cream jar with a decorative lid needs to be shown from standard packshot angles and a dramatic low‑angle hero shot that shows the texture of the jar. Once the master model is built, you can generate these angles in minutes, not days.
Kitchen storage containers. A 10‑piece set of nesting containers needs to be shown individually and as a complete set. You also need to show the interior of each container so customers can see the volume. With 3D, the nesting relationship is built into the model. Individual and group shots can be rendered with the same consistent lighting.
Hardware and tools. A small parts organizer needs a product overview shot and also an exploded view that shows every compartment, plus a cross‑section that illustrates wall thickness and durability. These technical views are difficult to shoot in a studio. In 3D, they are straightforward.

When a 3D workflow works best (and when it might not)
A 3D approach is not the right tool for every single project. Here is a decision framework to help.
Use 3D when…
You have a complex product line with many SKUs or variations.
You need to show the product before it is physically manufactured.
You anticipate many future angle or variant requests from creative or marketing teams.
You need 360° spins or exploded technical views.
Your budget allows for the initial model development, aiming for long‑term savings.
Traditional studio photography might still be the better choice when…
You only need a few images for a small, one‑time project.
The product is a one‑off with no planned variations or updates.
You have a very tight budget and no need for future assets.
Many brands succeed with a hybrid strategy: CGI for core packshots, product variants, and 360° spins; traditional photography for high‑impact, authentic lifestyle images with people or complex environments.

Frequently Asked Questions (FAQ)
Can 3D rendering really match the quality of studio photography?
Yes. Modern rendering software produces photorealistic images that are consistently indistinguishable from high‑end studio photography. In fact, 3D often exceeds photography for complex materials because you have total control over lighting and reflections.
How many angles can I generate from a single 3D model?
There is no limit. Once the model is finalized, you can render it from every conceivable angle, distance, and focal length — including 360° spins, interior cutaways, and exploded views.
What about showing the container with the lid off?
The lid is modeled as a separate component. You can hide or unhide it with one click. Interior details, sealing surfaces, and stacking features can be shown clearly without any additional work.
Do I need physical product samples to get started?
Not necessarily. We can work from CAD files, technical drawings, reference photos, or existing product samples. For pre‑launch marketing, a 3D model can be built long before the first physical sample is manufactured.
Is 3D rendering more expensive than studio photography?
For a single product with no variations, a studio shoot may be more cost‑effective upfront. However, for large product lines or products that will be updated frequently, CGI is almost always more economical in the long run because the master model can generate unlimited content without additional shoots.
How do I integrate 3D‑generated images into my ecommerce platform?
Standard image formats (JPEG, PNG) work seamlessly with all platforms. 360° spins can be embedded using simple JavaScript libraries. Many marketplace platforms, including Amazon, Walmart, and Shopify, have direct support for 3D product views.
Can I see examples of your 3D product rendering work for containers and packaging?
Yes. Visit our portfolio page to see real projects where we have used 3D product rendering to create comprehensive product image libraries.