3D rendering for gaming gear and esports hardware: headsets, mice, and controllers

Gaming hardware lives or dies on how it looks. RGB lighting, aggressive contours, textured grips, translucent shells, and switchable faceplates are core selling points, and shoppers compare them side by side across dozens of tabs before buying. Capturing all of that in a studio is fiddly: RGB blooms unpredictably, matte and glossy plastics sit awkwardly under the same light, and every new colorway means another session. For headset, mouse, keyboard, and controller brands, 3D rendering has become the fastest way to make gear look as good in the image as it does on a desk.
With CGI, lighting effects can be dialed in exactly, a mouse can be shown from the palm-grip angle that actually sells it, and a keyboard's switches or a controller's triggers can be exploded out for spec-led pages. The same accurate model powers a clean store shot, a moody hero, a 360 spin, and a social animation without re-shooting anything. This guide covers why gaming gear suits rendering so well, the details that matter most, and how a production pipeline scales from one model to a full campaign.

Why gaming and esports gear is ideal for 3D rendering
Gaming peripherals are designed in CAD, iterate quickly, and ship in constant new editions — team colors, signature-player variants, seasonal drops — which is precisely the situation where rendering beats photography. One accurate model can be re-skinned and re-lit endlessly, so a limited colorway does not need a studio booking. The audience is also visually demanding and compares products closely, so the clean, high-contrast hero and consistent catalog set that CGI delivers is a genuine edge. And because so much of the appeal is lighting and finish, having full control over how RGB reads and how a soft-touch coating catches light matters more here than in almost any other category, more even than in a general consumer electronics catalog.
RGB, textures, and translucency: the details that sell
The details that make gaming gear feel premium are exactly the ones a studio struggles with. RGB lighting has to glow convincingly without washing out the product or the scene; translucent and smoked shells need believable light transport through the plastic; textured side grips and hex patterns need micro-detail that survives a zoom; and the mix of matte body, glossy accents, and metallic scroll wheels has to coexist under one coherent light. In CGI each of these is controllable and, crucially, repeatable across every SKU. That control over difficult surfaces is the same reason brands turn to rendering for tech products and gadgets generally — gaming just pushes it further.
The angles that convert for each device
Each device has an angle that does the selling. Gaming mice convert on a three-quarter palm view that shows the side buttons, the grip texture, and the cable or dongle, plus a top-down for shape. Headsets sell on the three-quarter that reveals the ear-cup lighting, the mic boom, and the headband, with a folded or stand shot for context. Mechanical keyboards need a low raking angle that catches keycap profile and switch glow, plus a top-down for layout. Controllers reward a front hero showing stick and trigger geometry and a back view for grips and paddles. Rendering every one from a single model keeps the set consistent, and turning any of them into a 360 spin or zoom is trivial.
From store shot to hype: social, spins, and exploded views
Gaming marketing is not just store listings — it is hype. The same model that produces a clean e-commerce shot can be dropped into a dark, neon-lit hero for a launch, animated with pulsing RGB for a social teaser, or exploded to show switches, sensors, and battery for a spec page. Because it is all one asset, the store shot and the campaign hero are unmistakably the same product, which keeps the brand tight across channels. This multi-use efficiency is the same logic behind using CGI for social media ads, where one model feeds an entire content calendar.
The production process, step by step
A gaming hardware render project usually runs like this:
Gather CAD or a clean mesh, physical units, colorway specs, and RGB behavior references.
Build or clean the model so contours, buttons, and seams match the production unit.
Author materials — matte and soft-touch plastic, glossy accents, translucent shells, metal wheels.
Set up the RGB and scene lighting so glow reads convincingly without blowing out the product.
Render the hero and full catalog angle set for each device from one model and rig.
Produce spins, exploded views, and any social or launch animations from the same asset.
Retouch and color-check for consistent finish and accurate lighting across the line.
Archive the model so new editions and team colors reuse it without a rebuild.
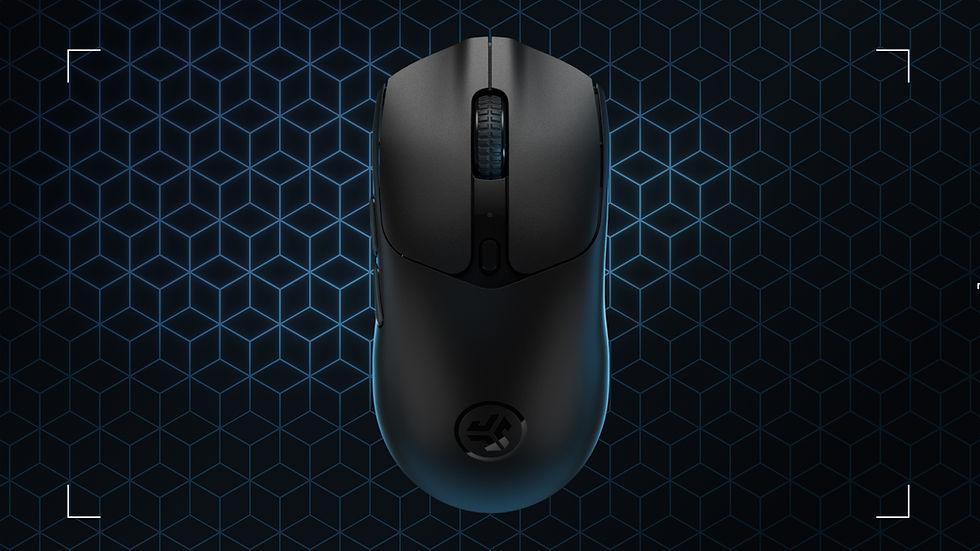
A typical scenario
An esports brand is dropping a mouse and headset in a team edition alongside the standard black. The studio builds one model each from CAD, authors the soft-touch coating, the RGB zones, and the translucent scroll wheel, then renders heroes, catalog angles, and a top-down for both. The standard set re-renders in team colors by swapping materials and RGB presets, so the two editions match perfectly. An exploded mouse diagram goes to the spec page, and a neon launch hero and a looping RGB animation feed the social calendar — all from the same models. When a keyboard joins the line-up, the pipeline is already set, echoing the throughput described in our 3D content conveyor.
Common mistakes to avoid
The most common mistake is letting RGB dominate so the product glows into an unreadable blob — the light should flatter the shape, not hide it. Others include rendering translucent shells as opaque plastic, flattening grip textures so they vanish on zoom, and mixing matte and gloss under careless light so finishes look wrong. Teams also model from photos and let contours drift from the real unit, forget to plan spin and exploded assets until after the budget is spent, and light each SKU differently so a family of colorways looks mismatched. Finally, skipping the archived model means every new team edition starts from scratch.
Getting started
List the devices and editions you need to show, and collect the strongest inputs — CAD, physical units, exact colorways, and how the RGB is meant to behave. Decide which angles and extra assets — spins, exploded views, social animations — each product needs so the model is built to serve them. With good CAD a studio can move fast; without it, one clean model per device is the base everything reuses. When you are ready to make your gaming line look as sharp in the image as on the desk, our photorealistic 3D product rendering service covers headsets, mice, keyboards, and controllers from hero to exploded diagram.

Frequently asked questions
Why do gaming brands use 3D rendering instead of photography?
RGB lighting, translucent shells, and mixed matte-and-gloss finishes are hard to shoot consistently. CGI gives exact control over lighting and materials, keeps every colorway consistent, and lets brands add team editions or new SKUs without another studio session.
Can CGI show RGB lighting realistically?
Yes. In a render, RGB is a controllable light source, so it can glow convincingly without washing out the product or the scene, and it can be tuned per zone. You can also show the exact same effect across every colorway, which a studio cannot easily repeat.
What assets can one gaming model produce?
A single accurate model yields hero and catalog shots, 360 spins, exploded spec diagrams, dark neon launch heroes, and social animations. Because everything comes from one source, the store listing and the campaign hero are unmistakably the same product.
How are new team colors or limited editions handled?
They are material and RGB swaps on the existing model, so the whole image set re-renders without restyling or reshooting. That makes frequent editions — a hallmark of gaming and esports gear — far cheaper to visualize.
Do you need CAD to render gaming peripherals?
CAD speeds things up and improves accuracy, but a clean model can be built from a physical unit and specs. The important part is that the model's contours and buttons match the production hardware before materials and lighting are applied.


